Protect Folder With Htpasswd In Apache
Below
is
showing what the end result will look like and what this article will
help you achieve.
Step
1 – Create the folder and set the permissions on it
If
the folder you want secured doesn’t exist, go ahead and create it. Then
set the correct permissions and owner for the folder. I am using
www-data as our folder owner as this is the owner that apache website
runs as.
1.
cd
/var/www/html
2.
mkdir
secured_folder
3.
chmod
744
secured_folder
4.
chown
www-data.www-data
secured_folder
5.
cd
secured_folder
Step
2 – Create your .htaccess file
Change
to
the ‘secured_folder’ and create an .htaccess file inside their with the
contents below. This will add the username and password security to the
folder.
1.
AuthUserFile /var/www/.htpasswd
2.
AuthGroupFile /dev/null
3.
AuthName "My
protected
files"
4.
AuthType Basic
5.
<Limit GET>
6.
require valid-user
7.
</Limit>
** the path to the .htpasswd is what you put there. You can multiple with
different names for each folder that you want to secure.
Step
3 – Create the username and password for .htpasswd file
Now
change
to the folder you want your .htpasswd is to be stored in. We specified
/var/www/.htpasswd as you can see the above for ‘AuthUserFile’. Then use
the htpasswd function in your command line to create the username and
password for the folder you want to secure. It is recommended that you
leave this file outside of the actual website folder.
1.
cd
/var/www/
2.
htpasswd
-c .htpasswd
username1
You
will
be asked to enter a password for ‘username1′.
**
Replace .htpasswd with what you created above. Can be folder specific.
Step
4 – Adding more users to .htpasswd file (optional)
If
you would like to add multiple users to the same .htpasswd file then
don’t add the ‘-c’ option.
1.
cd
/var/www
2.
htpasswd
.htpasswd
username2
3.
you will be asked to enter a password for 'username2'
4.
htpasswd
.htpasswd
username3
5.
you will be asked to enter a password for 'username3'
Now
when
you go to visit your page, it will prompt you to enter a username and
password before you can access the page.
** Replace
.htpasswd with what you created above. Can be folder specific.
Disable Apache Cache
https://ubiq.co/tech-blog/disable-apache-cache/
#Initialize mod_rewrite
RewriteEngine On
<FilesMatch "\.(html|htm|js|css)$">
FileETag None
<IfModule mod_headers.c>
Header unset ETag
Header set Cache-Control "max-age=0, no-cache, no-store,
must-revalidate"
Header set Pragma "no-cache"
Header set Expires "Wed, 12 Jan 1980 05:00:00 GMT"
</IfModule>
</FilesMatch>
Link to folder share in Apache
This should be in your website conf
Alias
/library
/media/library
<Directory
/media/library/>
Options Indexes FollowSymLinks
AllowOverride
None
Order Deny,Allow
AuthName "Rich's
Personal Library"
AuthType Basic
AuthUserFile /var/www/lemmermann.tech/.library_htpasswd_file
Require valid-user
</Directory>
This should be similar in /etc/fstab
//192.168.1.77/WebDoc /media/library cifs
username=<user>,password=<pass>,defaults 0 0
renamed from eth0:
#
$ sudo nano /etc/default/grub
Look for “GRUB_CMDLINE_LINUX”
and add the following "net.ifnames=0
biosdevname=0"
From:
GRUB_CMDLINE_LINUX=""
To:
GRUB_CMDLINE_LINUX="net.ifnames=0 biosdevname=0"
Then Write the Changes:
$ sudo grub-mkconfig -o /boot/grub/grub.cfg

	Generating grub configuration file ...
	Warning: Setting GRUB_TIMEOUT to a non-zero value when GRUB_HIDDEN_TIMEOUT is set is no longer supported.
	Found linux image: /boot/vmlinuz-4.4.0-15-generic
	Found initrd image: /boot/initrd.img-4.4.0-15-generic
	Found memtest86+ image: /memtest86+.elf
	Found memtest86+ image: /memtest86+.bin
	done
https://www.itzgeek.com/how-tos/mini-howtos/change-default-network-name-ens33-to-old-eth0-on-ubuntu-16-04.html
SSL Cert in Apache
This is what the config file should look like. Essentially, you want to match up the appropriate files to the certificates that you're using.
<VirtualHost *:443>
ServerAdmin elearn@crouse.org
DocumentRoot /var/www/elearn
ServerName elearning.crouse.org
ErrorLog ${APACHE_LOG_DIR}/error.log
CustomLog ${APACHE_LOG_DIR}/access.log combined
SSLEngine on
SSLCertificateFile /etc/apache2/ssl/public.crt
SSLCertificateKeyFile /etc/apache2/ssl/private.key
SSLCertificateChainFile /etc/apache2/ssl/intermediate.crt
</VirtualHost>
SSL CSR with OpenSSL and Response
First, create a file for config of any SANs (Subject Alt Names) you need
ie: san.cnf
[
req ]
default_bits
= 2048
distinguished_name
= req_distinguished_name
req_extensions
= req_ext
[
req_distinguished_name ]
countryName
= Country Name (2 letter code)
stateOrProvinceName
= State or Province Name (full name)
localityName
= Locality Name (eg, city)
organizationName
= Organization Name (eg, company)
commonName
= Common Name (e.g. server FQDN or YOUR name)
[
req_ext ]
subjectAltName
= @alt_names
[alt_names]
DNS.1
= bestflare.com
DNS.2
= usefulread.com
DNS.3
= chandank.com
Create the CSR and Private Key now
openssl req -out sslcert.csr -newkey rsa:2048 -nodes -keyout private.key -config san.cnf
Verify SAN
openssl req -noout -text -in sslcert.csr | grep DNS
	[root@Chandan test]# openssl req -noout -text -in sslcert.csr | grep DNS
               DNS:bestflare.com, DNS:usefulread.com, DNS:chandank.com
	[root@Chandan test]#
Create p12 file from CA Response
openssl pkcs12 -export -in sslcert.crt -inkey private.key -certfile intermediate.pem -name "www.site.com" -out certificate.p12
https://support.code42.com/Administrator/6/Configuring/Use_OpenSSL_to_install_a_keystore
https://geekflare.com/san-ssl-certificate/
Create pfx file from CA Response
openssl pkcs12 -export -in sslcert.crt -inkey private.key -name "www.site.org" -certfile intermediate.pem -out certificate.pfx
How to work with certs in Apache
Updated 2020-02-15 with newer instructions that make more sense
# WinSCP the wildcard cert (at time of writing), 2018-19-Wildcard.pfx, to the ~/
# WinSCP the intermediate cert to ~/
# You will need the password for the root combo pfx
# Copy the intermediate to its home (If applicable)
sudo cp
~/intermediate.crt
/etc/apache2/ssl/intermediate.crt
# Export public key
openssl pkcs12 -in [yourfile.pfx] -clcerts -nokeys -out [public.key]
# Copy the public key to its home
sudo cp
~/public.key /etc/apache2/ssl/public.key
# Extract the Private cert from the pfx
openssl pkcs12 -in [yourfile.pfx] -nocerts -out [private-encrypted.key]
# Copy the private key to its home
sudo cp
~/private-encrypted.key /etc/apache2/ssl/private-encrypted.key
# This will remove the key so that Apache2 can start without having to sign in to paste in the key
sudo openssl rsa
-in ~/private-encrypted.key -out
/etc/apache2/ssl/private.key
# Restart Apache2
sudo
/etc/init.d/apache2
restart
https://www.markbrilman.nl/2011/08/howto-convert-a-pfx-to-a-seperate-key-crt-file/
https://stackoverflow.com/questions/15413646/converting-pfx-to-pem-using-openssl
https://serverfault.com/questions/160768/stop-apache-from-asking-for-ssl-password-each-restart
PEM with RSA Private key (ie NetScaler)
Example with this: snet.crouse.org_password.pfx
openssl pkcs12 -in snet.crouse.org_password.pfx -out snet.crouse.org_2020.pem -nodes
openssl rsa -outform der -in snet.crouse.org_2020.pem -out snet.crouse.org_2020_rsa_private.key
penssl x509 -outform der -in snet.crouse.org_2020.pem -out snet.crouse.org_2020_private.cer
https://discussions.citrix.com/topic/397777-netscaler-ver-121-cannot-import-ssl-pfx-error-no-certificates-present-in-the-certificate-bundle-file-rapidssl-digicert-entrust/
How to get .pem file from .key and .crt files?
openssl rsa -in server.key -text > private.pem
openssl x509 -inform PEM -in server.crt > public.pem
https://stackoverflow.com/questions/991758/how-to-get-pem-file-from-key-and-crt-files
Remove password from a PFX file
openssl pkcs12 -in pfx.pfx -nodes | openssl pkcs12 -export -keypbe NONE -certpbe NONE -out output.pfx
https://security.stackexchange.com/questions/195080/how-to-convert-my-cert-chain-to-pfx-without-a-password
Get all Trusted Root Certs ,trusted
# Use rootups on Windows to download all Trusted Root Authorities
# Select all and export with a key
# SCP to Linux box
# Copy your certificate in PEM format (the format that has ----BEGIN CERTIFICATE---- in it)
sudo openssl pkcs12
-in AllRoots.pfx
-out
/usr/local/share/ca-certificates/allroots.crt -cacerts
# into /usr/local/share/ca-certificates and name it with a .crt file extension.
sudo update-ca-certificates.
Validate cert chain of website
openssl s_client -showcerts -connect www.domain.com:443
PFX to PEM, quickly
openssl pkcs12 -in d:\Temp\cert.pfx -out d:\Temp\cert.pem -nodes
To convert PFX and get separate PEM files for certificate and key
# Extract private key
openssl pkcs12 -in certname.pfx -nocerts -out key.pem
# Extract certificate
openssl pkcs12 -in certname.pfx -clcerts -nokeys -out cert.pem
#You can also remove passphrase from the private key:
openssl rsa -in key.pem -out server.key
#And finally, concatenate the key and certificate:
cat key.pem cert.pem > certname-full.pem
The -nodes removes the password from the created PEM file. If you
wish to maintain the password encryption omit the -nodes however this
may make it difficult to use the PEM file on your device. You will be
prompted to type the password for the pfx file.
https://www.itprotoday.com/windows-78/converting-certificate-files-pfx-format-pem
DER to CRT/PEM (to base64), quickly
As you have the
openssl tag on your question, you should use:
openssl x509 -inform der -in infile.cer -out outfile.cer
In the reverse direction:
openssl x509 -outform der -in infile.cer -out outfile.cer
"The password you entered is incorrect" when importing .pfx files to Windows certificate store
https://stackoverflow.com/questions/69343254/the-password-you-entered-is-incorrect-when-importing-pfx-files-to-windows-cer
openssl
.
Apache ReWrite to SSL
$ sudo a2enmod rewrite
Put this in your *:80 section of your config
RewriteEngine On
RewriteCond %{HTTPS} !on
RewriteRule (.*) https://%{HTTP_HOST}%{REQUEST_URI}
Grab all subject alt name from a cert
openssl s_client -connect server.org:443 | openssl x509 -noout -text | grep DNS
Example with "google.com":
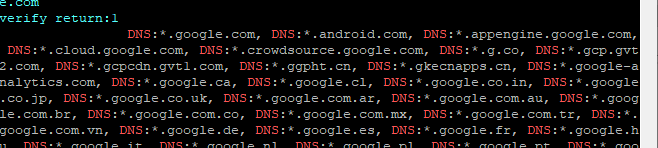
# Get all certs in a chain
openssl s_client -showcerts -verify 5 -connect $1:443 < /dev/null |
awk '/BEGIN CERTIFICATE/,/END CERTIFICATE/{ if(/BEGIN CERTIFICATE/){a++}; out="cert"a".pem"; print >out}'
for cert in *.pem; do
newname=$(openssl x509 -noout -subject -in $cert | sed -nE 's/.*CN ?= ?(.*)/\1/; s/[ ,.*]/_/g; s/__/_/g; s/_-_/-/; s/^_//g;p' | tr '[:upper:]' '[:lower:]').pem
echo "${newname}";
# mv "${cert}" "${newname}"
done
List Cert details
echo quit | openssl s_client -showcerts -servername $1 -connect $1:443 > cacert.pem
Let's Encrypt Install in Linux
sudo apt-get install software-properties-common
sudo apt-get install certbot
sudo apt-get install python3-certbot-nginx
sudo apt-get install python3-certbot-apache
sudo certbot --apache
sudo certbot renew --apache
0 */12 * * * root certbot -q renew --apache
Let's Encrypt Generate a manual certificate
LetsEncrypt Certificate Request
sudo certbot run -a manual -i apache -d cal.lemmermann.tech
Certs get placed here: /etc/letsencrypt/archive/
Let's Encrypt Renew
sudo certbot --apache